

Updating the SNAP system software
Downloading and installing a system software update for the SNAP
The SNAP is capable of Updating the System Software by either of the 2 Methods:
The most “Popular” Method is by using the Network via Internet to Connect to our Server to Obtain the System File.
The “Alternative” Method is by using a Zip File, which would be sent via Email upon Request
Note: In order to use the “Update System Software via Internet” the SNAP must be allowed to Access Our Web-Server.
For using the “Alternative” to Update the SNAP, The Dealer would need to Contact WaveWare Technical Support and then we would “Create” the Latest Version and Send a Reply with a Zip File attached for updating the SNAP.
NOTE: The Method of “Update via Zip File” is for our “Dealers Only” to Request. The End User would be “Required” to Contact their Dealer for Help with this Request, as WaveWare works thru our Dealer Base and the Dealer must always be involved with the Products / Customers they are supporting. No Exceptions.
Getting Started
To understand how to work with the 2 Methods offered for Updating the SNAP System Software, you will be working from the Main SNAP Configuration Browser Page. Whether you are using an Internet Web Browser or the Alternative HDMI TV Method to Connect to the SNAP... You will still see this Same Exact Page.

This Main Configuration Page is Setup as a Standard TAP-In and TAP-Out and a Pager App Output as well...offering a Basic View of just One Scenario of a Common Setup “Could” look like. Yours may be Different than what is shown above. This Main Configuration Page is used as a Reference only.
On the Main Configuration Screen, Click on the “Settings” Button found at the Top Left of the Main Menu, as seen below in the Red Box.

Clicking on the “Settings” Button will take you Directly to the “System” Configuration Page.
The “System” Configuration Page is where you would be offered a View of the SNAP’s Main System Configuration.
This Page offers Important Information about the SNAP including:
The Version Number (System Software / Firmware Version of the SNAP)
Choosing to use DHCP or Manally Enter the Network Data
Enter the Network Configuration (Must Enter Data in All 3 Network Fields)
Enter the Time Server
Set the Time Zone
Set Password
Set Host Name for the SNAP
Set the Site Name
Save Button...(For use to Save any Changes to the System Configuration Page)
Update Registration Key (For when Adding Additonal Features / Options/ Pager App Licenses, etc.)
Reboot the System Remotely (Without having to Physically use the Power On/Off Button on the SNAP Hardware)
Export and Import the SNAP Database (Great for having a Backup and Cloning of the SNAP Setup)
Update the SNAP System Software Version by Choosing either “via Internet” or “via a Zip File” (This Guide)
The SNAP “System” Configuration Page as Shown below offers a great deal of information and allows for “Custom” Settings as Required for use at each Customer Site Installation.
Below within the Blue Box, you will Notice the Current “Version” Number of the SNAP System you are working with.
It is also recommended that you First Contact WaveWare Tech Support before Updating the SNAP in order to be certain that doing an Update will be OK for the SNAP System you are working with and so would not cause any issues. This is because some SNAP Systems may be older / different Hardware and might require a different Update, if one is available, for the older System’s Hardware. But in most cases this should not be an issue.
Below within the Red Box you will see the Options in Text Format for Exporting System Database and Importing System Database and for Reboot System. Plus the Features we are discussing within this Guide, the 2 Methods for Updating the SNAP System Software: “via the Internet” or “via the Zip File”, as seen within the Green Box Below.
UPDATING VIA THE INTERNET
Important Note: “Before” you get Started, it is Highly Recommended to First Check the “Current Version” of the SNAP, for use as a Comparison after the Update Procedure has been Completed or you may not know if the SNAP was really Updated at all.
To Find the "Version" Number of the SNAP, Please go into "Settings" and look at the "Top Left Corner" of the Settings Screen for the Current Version of that SNAP (See previous page)...
This Information is shown within the “System Configuration Page” Screen Shot (Blue Box), above.
To Update the SNAP System Software by way of the “Internet” Click on “Update System Software via Internet” Text.

To Update the SNAP System Software by way of the “Internet” Click on “Update System Software via Internet” Text as seen above in the Red Box.
Note Please, that the SNAP will need to have Access to the Outside world to reach our Server to get the System Software File it requires for this Update.
The SNAP will then let you know the different Steps as it Reaches the Server and so Starts this Process.
First Step would be: After you Click the Internet Update Choice....The SNAP will display the Following Window:

To get this Process Started, Click “OK”.
*** IMPORTANT NOTE *** Please DO NOT power off or unplug the SNAP from power during this process.

The Next set of Screens will offer you information as to what “Step” the SNAP is at, during the Entire Process.
At this Stage, the Step is: “Downloading update files...”

Note: You may also see a Quick Flash across the Screen that the Text will state as: “Installing update files...”

Then the Next Step is: “Running configuration script...”
Then shortly after that, the Next Step is: “System is restarting, this page will reload when complete.”
Note Please, That this process may take a few Minutes, Please be Patient. The Entire Process of Installing and Rebooting “Generally” may take up to 5 to 6 Minutes Max Time to Complete. Sometimes the Process also depends on the Network / Internet Connection Speed.
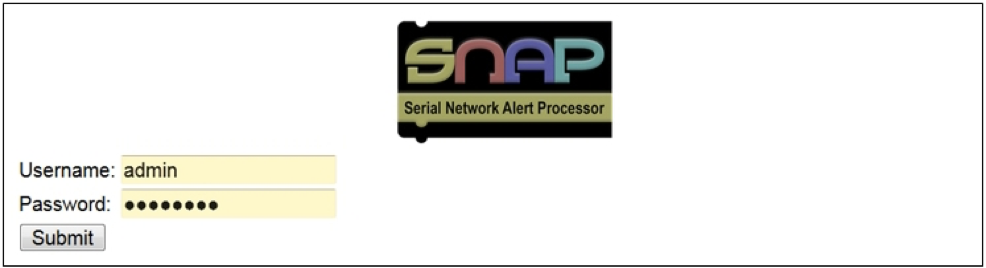
When the SNAP is Finished with the Update and so then the SNAP has Restarted Properly...
You should always see the Log-in Screen as seen below:

Note that you may have to Click the “Refresh” Icon of the Browser Window before you see this Screen Below, but you will need to wait the Max Time to elapse before doing so.
Default User Name: admin and Default Password: password.
Log-in to Start using the SNAP and then Double Check that the Procedure was Successful with the Update by looking at the Version Number in the “Settings” Screen as before. You should now see a different “Version Number” or “Letter”.
UPDATING VIA ZIP FILE
This Section will Help to Explain How to Update the SNAP System Software by way of using a ZIP File.
Important Note: “Before” you get Started, it is Highly Recommended to First Check the “Current Version” of the SNAP, for use as a Comparison after the Update Procedure has been Completed or you may not know if the SNAP was really Updated at all.
To Find the "Version" Number of the SNAP, Please go into "Settings" and look at the "Top Left Corner" of the Settings Screen for the Current Version of that SNAP.
***Important: Before you get started....Information to know ”Before” Requesting a Zip File to Update the SNAP***
To Request a Zip File, Contact your Dealer...The End User / Customer cannot Directly Contact WaveWare for this File.
The “Dealer” will need to Contact WaveWare Technical Support in order to Request the Zip File for the SNAP Update.
Note: Unless obvious the Request is from a WaveWare Dealer, then WaveWare Support will ask for Verification of being a WaveWare Dealer “Before” we begin the Process of Creating a Zip File to be Sent.
We ask the Dealer be involved mainly because they need to be for something as Important as Updating the SNAP.
The Reason to Update may not be Valid and so any issues might instead be Resolved by working with the Configuration.
There are 2 methods to receive the Zip File from WaveWare Tech Support:
Send an Email to WaveWare Technical Support at: support@wirelessmessaging.com or through our Support Portal.
Contact WaveWare Technical Support via a Phone Call and offer us the Email Address to send it to.
Before Support can Create and Send the Latest Update File in Zip Format, you will need to Supply the Current Version of the SNAP you are inquiring to Update. The Reason why we need this Information? This is because the “Version” of the SNAP you wish to Update may not be able to use the Zip Fille Method of Updating... As this is a Very New “Method” that was just Recently Added to the SNAP System Software Update Feature. But generally IF the Choice is seen on the Settings Screen, you should be able to use this Method... But we still want the Version Number anyway. So when you Request the ZIP File, Please be sure to include the “Current Version” of the SNAP you wish to Update.
Important Note: If the Current “Version” of the SNAP is NOT included within the Email Request, this wil Slow Down the Entire Update Process. Because Support will have to ask for the Version “Before” Creating and/or Sending the Zip File.
To Update the SNAP System Software by way of the “Zip File” Click on “Update System Software via Zip File” Text as seen below in the Green Box.

Once WaveWare Support has Created the Zip File, it will be Sent via Email to the Email Address given and when Received you would place the Zip File into a Folder on the PC / Laptop that the SNAP is attached to, generally working thru the Browser, but if Directly Attached via the Alternative Method of using a HDMI TV / Monitor, then you still can do this.
When you “Click” onto the Text: “Update System Software via Zip File” on the Settings Screen, then the SNAP will Open a New Window to let you Search for the Folder where you Placed the Zip File, previously sent to you. As seen below in the Screen Shot, Notice the Zip File was placed into the Folder I created, called “SNAP Zip Files”, as seen in the Red Box. The Zip File as seen in the Green Box would be Highlighted, then you Click “Open” as seen in the Blue Box at the Bottom of the Window... To Start the Update Process.
Note that at this time, after you Click “Open”, then there is No Turning back and the SNAP is going thru the Update Process.

Important Note: Please Do Not Power Off the SNAP during this Process.

After Clicking “Open”.... Then the Next Step is: “Running configuration script...”

Then shortly after that, the Next Step is: “System is restarting, this page will reload when complete.”
Note Please, That this process may take a few Minutes, Please be Patient. The Entire Process of Installing and Rebooting “Generally” may take up to 5 to 6 Minutes Max Time to Complete. Sometimes the Process also depends on the Network / Internet Connection Speed.
When the SNAP is Finished with the Update and the SNAP has Restarted Properly you should always see the Log-in Screen as seen below:
Note that you may have to Click the “Refresh” Icon of the Browser Window before you see this Screen Below, but you will need to wait the Max Time to elapse before doing so.
Default User Name: admin and Default Password: password.
Log-in to Start using the SNAP and then Double Check that the Procedure was Successful with the Update by looking at the Version Number in the “Settings” Screen as before. You should now see a different “Version Number” or “Letter”.